Hi! In this article I want to share my experience of setting up Stripe payments with Flutter.
I’m working on a mobile app that should allow users to create tasks (such as cleaning, walking the dog, and others), and other users to respond to the tasks and be paid when the task will be finished. In short, there has to be a money transfer between users.
The most popular and well-documented way to make payments is to use Stripe. But I didn’t find any articles that show how to store a bank card in Stripe, use it later, or transfer money from your bank card to another person’s card. All the information I found was related to discounted libraries or simply insecure.
In this article, I want to show how I solved it and made payments with Stripe. There won’t be any Example project on GitHub at the end, but all methods are working and you can just copy them and use them if you need. Of course, you can handle my ideas in a better way, and if so, please write down your code in the comments. So, let’s start!
Stripe account
To be able to work with Stripe, the first thing you should do is to create an account, obviously. The platform will guide you through the process of filling in different kinds of information about who you are, but you can skip it for now and do it later.
On the dashboard, select the Developer section and find API Keys.
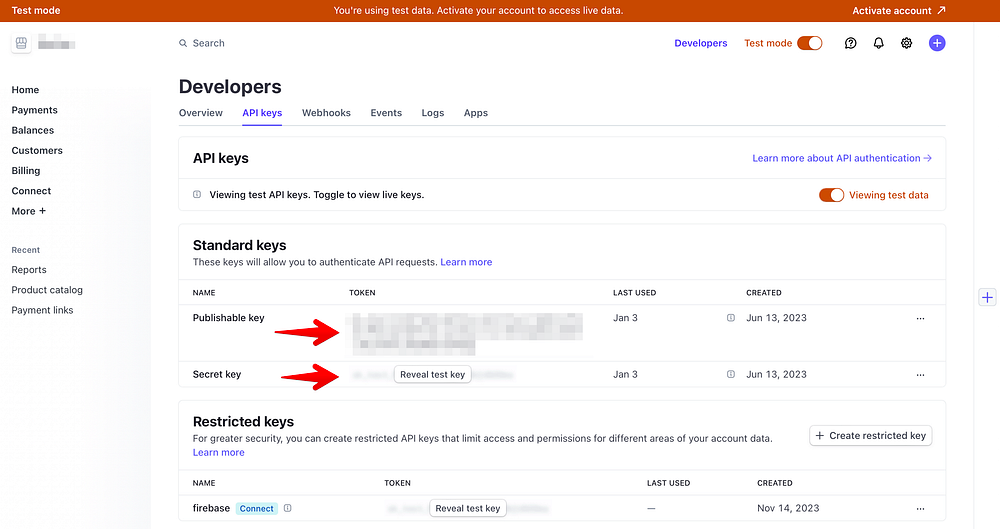
Securely store both — the Publishable and the Secret keys in your app (I’m using the dotenv package), to communicate with Stripe API later. You may also notice that you work in test mode for now, so you can safely work with transactions.
Flutter integration
The next step is to add Stripe to your app. You can do this by adding the flutter_stripe package to your dependencies.
Then we have to prepare Stripe to use in our app. In the main.dart, add the following code:
// The main function that kicks off the execution of the Flutter application.
Future<void> main() async {
  // Ensure that the Flutter app's widgets are initialized properly before running the app.
  WidgetsFlutterBinding.ensureInitialized();

  // Load environment variables from a .env file.
  await dotenv.load();

  // Set the Stripe publishable key from the loaded environment variables.
  Stripe.publishableKey = dotenv.env[Keys.stripePublicKey]!;

  // Set the Stripe merchant identifier for the app.
  Stripe.merchantIdentifier = 'merchant.flutter.stripe.appTitle';

  // Set the URL scheme for handling deep links related to Stripe payments.
  Stripe.urlScheme = 'flutterstripe';

  // Apply settings for the Stripe SDK.
  await Stripe.instance.applySettings();

  // Run the Flutter app with the provided App widget.
  runApp(App());
}
Now we are ready to use Stripe. But for some cases, we won’t be using SDK methods, but will write our own.
Understanding the Stripe payment process
The thing is that you can’t just get the bank card’s information and transfer it to the billing server with no encryption. It is unsafe, and you can lose money. So how does Stripe help us with this…
In short, your Stripe account is the point where your users will transfer money and pay some fee for the service you provide. The users of your app in Stripe are called Customers. You can find more about it here.
To create a Customer object, we will write our own method that uses the http package:
// A function to create a customer in the Stripe payment system using the provided email.
Future<void> createCustomer({
    required String email,
  }) async {
    try {
      // Prepare the request body with the customer’s email.
      final body = <String, dynamic>{
        ‘email’: email,
      };

      // Make a POST request to the Stripe API to create a customer.
      final response = await http.post(
        Uri.parse(‘https://api.stripe.com/v1/customers’), // Stripe API endpoint for creating customers.
        headers: {
          ‘Authorization’: ‘Bearer ${dotenv.env[Keys.stripeSecretKey]}’, // Set the API key for authentication.
          ‘Content-Type’: ‘application/x-www-form-urlencoded’ // Set the request body content type.
        },
        body: body, // Include the request body in the POST request.
      );

      // Parse the response JSON and store the created customer data in ‘stripeCustomer’ variable.
      // 'stripeCustomer' is declared earlier.
      stripeCustomer = StripeCustomer.fromJson(
        json: json.decode(response.body),
      );
    } catch (err) {
      // If an error occurs during the process, throw an exception with the error message.
      throw Exception(err.toString());
    }
  }
The official API’s response is encapsulated in our own class StripeCustomer. The class itself code is as follows:
/// Represents a customer entity in the Stripe payment system.
class StripeCustomer {
  /// Unique identifier for the customer.
  final String id;

  /// Customer's balance, represented in cents.
  final int balance;

  /// Date and time when the customer was created.
  final DateTime created;

  /// Email address associated with the customer.
  final String email;

  /// Constructor to create a [StripeCustomer] object.
  StripeCustomer({
    required this.id,
    required this.balance,
    required this.created,
    required this.email,
  });

  /// Factory method to create a [StripeCustomer] object from JSON data.
  ///
  /// [json] - A Map containing the customer information in JSON format.
  /// Throws an exception if the required fields are missing or invalid in the [json].
  factory StripeCustomer.fromJson({
    required Map<String, dynamic> json,
  }) =>
      StripeCustomer(
        id: json['id'].toString(),
        balance: json['balance'].toString().toInt ~/ 100,
        created: DateTime.fromMicrosecondsSinceEpoch(int.parse(json['created'].toString())),
        email: json['email'].toString(),
      );
}
At this point, you can check your Customer in Stripe’s dashboard.
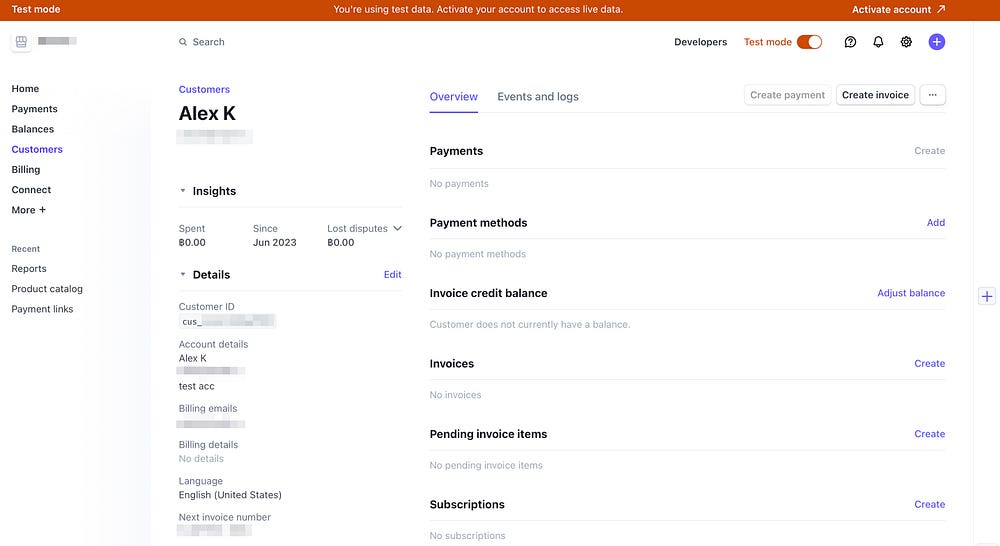
At this point, we have prepared Stripe in our app and a method to create a Customer object. Now let’s determine scenarios of payments in the app.
1. Top-up a customer’s balance.
In our app, the user’s payment can only be made at the point when the user needs to top-up his Stripe balance. The Customer in Stripe has a balance property that stores the amount of funds. And to do this, we will use the flutter_stripe package’s methods.
To top-up the balance, we have to create a Payment Intent object. It can be done with the following code:
  /// Creates a payment intent.
  Future<Map<String, dynamic>> createPaymentIntent({
    required String amount,
  }) async {
    try {
      // Request body
      final body = <String, dynamic>{
        // The amount should be in cents
        'amount': (int.parse(amount) * 100).toString(),
        'currency': 'THB',

        // The Customer ID, which balance will be toped-up
        'customer': stripeCustomer!.id,
        'receipt_email': stripeCustomer!.email,
      };

      // Make post request to Stripe
      final response = await http.post(
        Uri.parse('https://api.stripe.com/v1/payment_intents'),
        headers: {
          'Authorization': 'Bearer ${dotenv.env[Keys.stripeSecretKey]}',
          'Content-Type': 'application/x-www-form-urlencoded'
        },
        body: body,
      );

      // Return the Map object
      return json.decode(response.body);
    } catch (err) {
      throw Exception(err.toString());
    }
  }
Next, we need to initialize the Stripe payment sheet to complete the created Payment Intent. Do it with the following code:
Future<void> initStripePayment({
  required int amount,
}) async {
  // Create a payment intent, the method described above
  final paymentIntent = await createPaymentIntent(
    amount: (amount).toString(),
  );

  try {
    // Initialize Stripe payment sheet
    await Stripe.instance.initPaymentSheet(
      paymentSheetParameters: SetupPaymentSheetParameters(
        customerId: stripeCustomer!.id,
        paymentIntentClientSecret: paymentIntent['client_secret'], // Gotten from payment intent
        merchantDisplayName: 'MyCoolApp',
      ),
    );

  } on Exception catch (e) {
    log('initStripePayment() exception in PaymentStore: $e');
    topUpError = e.toString();
    paymentSheetInitialized = false;
  }
}
And now, we have to show the user a Stripe form to enter card credentials and proceed with the payment. This can be done with the following code:
await Stripe.instance.presentPaymentSheet();It will show the form to make the payment.

After the payment is completed, the Customer’s balance will remain unchanged. This is because the Customer added funds to our app’s Stripe account, and now we have to create a Customer Balance Transaction to add funds to specific Customer. This will be done with the following code:
Future<void> topUpBalance({
    required int amount,
  }) async {
    try {
      //Request body
      final body = <String, dynamic>{
        'amount': (amount * 100).toInt().toString(),
        'currency': 'thb',
      };

      //Make post request to Stripe
      final response = await http.post(
        Uri.parse(
          'https://api.stripe.com/v1/customers/${stripeCustomer?.id}/balance_transactions',
        ),
        headers: {
          'Authorization': 'Bearer ${dotenv.env[Keys.stripeSecretKey]}',
          'Content-Type': 'application/x-www-form-urlencoded'
        },
        body: body,
      );

    } catch (err) {
      log('topUpBalance() exception in PaymentStore: $err');
      throw Exception(err.toString());
    }
  }
After this action will be done the Customer’s balance will be changed.

2. Withdraw funds for app’s service.
Now our user’s balance has enough funds to make payments in our app for the task responses.
The Contractor selects a task in the app he wants to respond to. And to do this, he has to have enough funds in his Stripe balance. If there are enough funds, after he responds to the task, the specific amount of money will be withdrawn from his balance. If there are not enough funds, the user will be transferred to the top-up page (and again Stripe’s form will be shown).
To withdraw funds from a Customer’s balance, we will use the following method.
Future<void> withdrawCustomerBalance({
    required int amount,
  }) async {
    try {
      // Request body
      final body = <String, dynamic>{
        // Before this operation, we hae to be sure
        // that the `amount` is less or equal to `stripeCustomer!.balance`
        'balance': ((stripeCustomer!.balance - amount) * 100).toInt().toString(),
      };

      // Make post request to Stripe
      final response = await http.post(
        Uri.parse(
          'https://api.stripe.com/v1/customers/${stripeCustomer?.id}',
        ),
        headers: {
          'Authorization': 'Bearer ${dotenv.env[Keys.stripeSecretKey]}',
          'Content-Type': 'application/x-www-form-urlencoded'
        },
        body: body,
      );

      if (response.statusCode == 402) {
        withdrawError = json.decode(response.body)['error']['decline_code'].toString();
      }

      // Refresh the Stripe customer data
      await getStripeCustomer(
        email: stripeCustomer!.email,
      );
    } catch (err) {
      log('withdrawCustomerBalance() exception in PaymentStore: $err');
      throw Exception(err.toString());
    }
  }
In other words, we just manually change the Customer’s balance in Stripe.
Summary
In the end, we have a method to top-up the user’s balance on the Stripe platform and a method to withdraw funds for the app’s service.
Thanks for reading, hope this article will help someone. Any recommendations will be appreciated. If you found that I did things in the wrong way, please tell me about it.